TL;DR
The new Azure Role, “Role Based Access Control Administrator,” allows for granular control over role assignments. This blog post details the creation of a Terraform module to implement this functionality. The process involves understanding the functionality via the Azure portal, writing the code, and dealing with unsupported functions in the azurerm provider from Terraform by using the az api provider. A significant challenge was obtaining and formatting the condition string, which required analysis and string manipulation. The module also includes a custom condition input for added flexibility. The role can be created in the Azure portal using the advanced view.
Intro
The new Azure Role, “Role Based Access Control Administrator,” introduces a plethora of innovative ways to structure the RBAC on resources. Now, you can granularly control who can assign certain roles to specific users, groups, or service principals.
This is a fantastic development, and the user experience in the portal is straight forward. However, I wanted to implement this with code, specifically using Terraform. So, this blog post details how I created the Terraform module that makes this easier. You still need some knowledge about the role and how it works, but I find it much easier to use the module.
From problem to module
Whenever I learn something new in Azure, my first step is to open the portal and perform the “click-ops.” This gives me a quick understanding of the functionality, use cases, and how it interacts with other resources. After that, I’m ready to write the code for it.
Most of the new functions in Azure are not supported by the azurerm provider from Terraform. But since everything is essentially an API, we can always use the az api provider, which is, in simple terms, an API wrapper for Terraform. The API we need to use is the role assignment, which already exists in the azurerm provider. However, the azurerm provider doesn’t support the condition parameter (as of now), so we need to rely on the az api provider. I have listed the different resources under so you can check if they have been updated since this was created.
The next challenge is obtaining the condition string. Understanding its format and creating code to easily use it was a task. Either of the resources above will not help you with this, so creating a module to easier manage the complex string for the condition gives value. To do this, I downloaded the Azure role assignment from the portal to investigate the condition string.

The condition string can be located within the JSON object. It might require some formatting prior to use, but this can be readily accomplished with any programming language, Notepad++, or any other string manipulation tools at your disposal.

The condition string varies among the three different options. After some analysis and string manipulation, I had the basics of all three of them. Each one is based on the condition in the downloaded role assignment file.
After creating the condition, it’s all about making it user-friendly with well-named variables. The result can be found here.
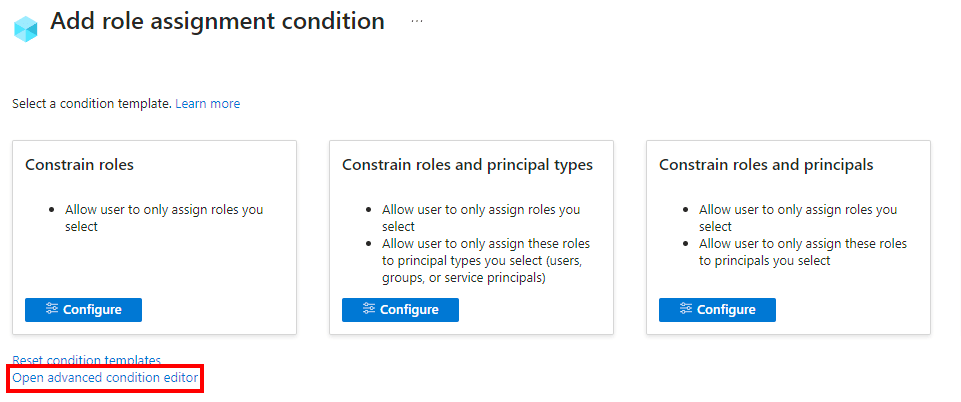
Custom Condition
In addition to this, I added a custom condition input so you can use it as well. In the portal you can find it under the advanced condition editor. To get it as a string you can follow the same steps as I have explained above.
- To create the role in the Azure portal, use the advanced view.
- Take the code from the view and remove the line shifts, or download it and remove the “\n” elements from the string.

Legg igjen en kommentar